Building a granny flat is a complex process involving designs, building approvals, land preparation, material sourcing, and, finally, infrastructure building.
Much like building a house, granny flats require specialist knowledge, with a multitude of decisions and paperwork needing to be navigated along the journey. Granny Flats WA takes care of all approvals and planning for clients, so the focus can be on designing the dream granny flat.
What is the first step to building a granny flat?
The first step to building a granny flat is figuring out the right design. Your design contains the features you want to include in your granny flat – it’s what builders use to guide the construction process. It influences all parts of the build, so it’s important to put thought into it.
You may opt for a premade design or a custom one. Premade designs have been previously drawn and, ordinarily, approved. Custom designs are drawn from scratch and submitted to the local council for building approval. But it’s worth noting that premade designs are often a starting point and can themselves be customised. This is often done to make granny flats more accessible.
Getting your design approved depends on how well it follows the relevant guidelines. However, recently, new laws have made amendments to these guidelines. Up until now, it has been necessary to get planning approval from your local council before building a granny flat. After April of 2024, this will no longer necessary and you must simply obtain building approval for your project.
However, if there are building-related issues with your design, it will be sent back for adjustments. Designs should be made in collaboration with a qualified architect or designer to ensure they are safe and functional. Architects and designers are aware of the relevant guidelines and which design choices increase your chances for approval. Your chosen builder typically takes care of the approval process and provides guidance about different features.
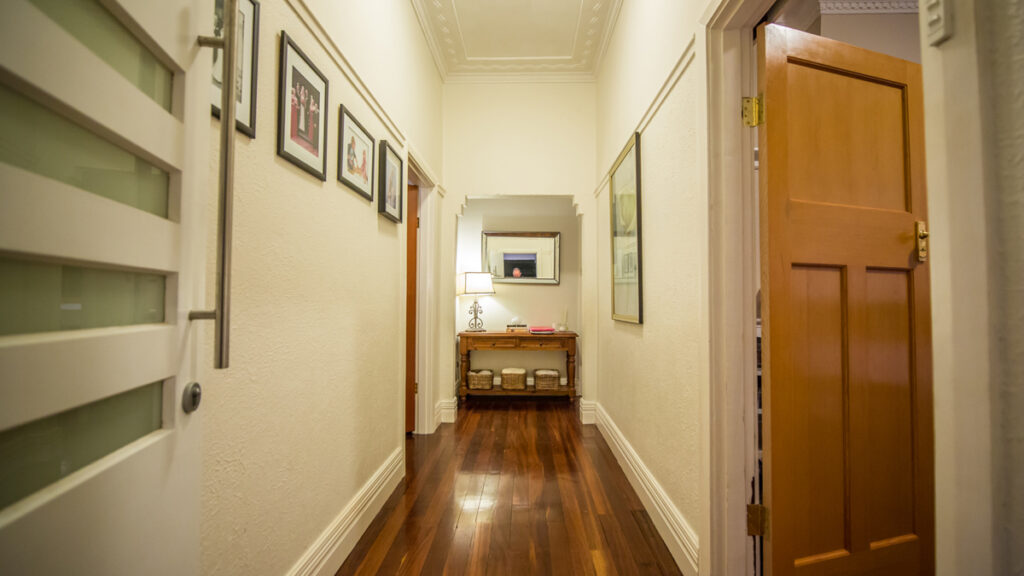
Our Booragoon showroom is an excellent place to get some inspiration for your granny flat design. We have multiple granny flat display homes available to help you get an idea of sizing and features for your granny flat. Feel free to discuss your ideas with one of our building & design consultants.
How do you prepare the land before building your granny flat?
You prepare land for a granny flat build by clearing obstructions and levelling the ground. This process is referred to as site works. The first step in site works is excavation, which is the process of removing obstacles from the land you’re going to build on. In simpler situations, this can be done with a shovel and a compactor. For more difficult circumstances, specialised equipment and machinery must be utilised by plant operators. Obstacles above the ground, like trees, rocks or concrete, must be ripped from the ground and removed from the building site. Below-ground obstacles like old plumbing pipes, electrical cables and septic tanks must be dug up before being removed.
After excavation, cavities and holes in the ground are filled and levelled. Holes remaining from the excavation and sunken structures like old swimming pools are topped up with soil, gravel and sand before being compacted into 300mm layers. This ensures the land is flat and suitable for a sand pad. A sand pad is a designated area to build the foundation. It is made by dumping a specific type of sand on the ground, which is then levelled and compacted.
Soil type is the primary consideration for determining the thickness and compaction required for the sand pad. Firmer soils, like loam, are preferable. They provide better support for a granny flat’s foundation. As a result, the sand pad doesn’t need to be as dense or thick. However, regardless of soil, sloping areas may require additional support. Retaining or additional concrete formwork are often added to provide better stability.
All of these preparation services are handled by a qualified builder like Granny Flats WA.
What are the stages of building a granny flat?
There are multiple stages to building a granny flat after site works are complete. Each stage adds an important new layer, integral to the granny flat’s structure. The five building stages are base, frame, lockup, fixing and completion.
Base Stage
In the base stage, the underground plumbing and concrete slab are prepared for the granny flat. The piping for the plumbing system is installed by a plumber before the concrete slab is poured. The concrete is poured into the designated area on top of the compacted sand pad. This serves as the foundation for the building. Concrete is typically used for foundational slabs because it’s durable, well-insulated and doesn’t require maintenance.
If the land is situated on an extreme slope, a steel frame stumped floor may be used instead of a concrete slab. This type of foundation is fully insulated and engineered to provide a stable base.
Frame Stage
The frame stage creates the granny flat’s skeleton. A frame gives shape to the walls, interior partitions and roof structure of a building. Wood and steel are the most commonly used materials for granny flat frames. Steel is a superior choice to wood due to its physical attributes – it has a better strength-to-weight ratio and better fire resistance. Steel also lacks susceptibility to splitting, warping, swelling, deterioration or termites. While steel frames cost more upfront, they last longer and rarely require replacement.
Pre-made frames can be assembled, depending on accessibility of the build site. With easy access, you have the option of delivering and assembling finished wall and roof frames. When access is limited, individual steel studs can be framed together to achieve a similar effect.
Lockup Stage
The granny flat’s exterior is installed in the lockup stage. Doors, windows, corbelling, thermal break insulation and external cladding are added to the wall framing. Meanwhile, roof sheets and Anticon insulation are installed in the roof framing. After the exterior is installed, preliminary lines are drawn for utilities in the interior walls. These determine where pipes and wires will be installed later in the build.
Fixing Stage
The fixing stage of granny flat construction involves installing utilities and internal cladding. Pipes, wires, batt insulation and other utilities are installed in the walls by the appropriate tradesmen. The interior walls are then covered with plasterboard (also known as gyprock). Windows get internal finishing including architraves and reveals. Other internal cladding, such as cabinets, skirting, and benchtops, are installed in the relevant areas of the granny flat. Wet areas of the house (kitchens and bathrooms) are set up with waterproofing and tiling.
Completion
During the completion stage, finishing touches are added to the granny flat. Household fittings such as light switches, faucets and locks are installed wherever necessary. All of the walls and ceilings around the granny flat also receive a fresh coat of paint. Depending on your flooring choice, wood is sanded, or other floorings like vinyl, carpets or tiles are installed. Soak wells, drains and downpipes are installed to keep stormwater on your property. And finally, a white ant treatment is applied to the surrounds of the granny flat.
Voila! Your granny flat is ready to live in.
What building materials are used for granny flat cladding?
A variety of building materials are used for granny flat cladding. Cladding refers to materials that make up the outer walls of a granny flat. Different cladding materials are suited to different design preferences. Wood, fibre cement, and steel are commonly used for granny flat cladding. Granny Flats WA is happy to accommodate the client’s preferred cladding.
Fibre Cement
Fibre cement is a popular and reliable type of cladding for granny flats. It is made from cement which has been reinforced with cellulose fibres. Fibre cement is manufactured as boards or sheets for easy and convenient installation. It is durable, low-maintenance, has excellent weather resistance and provides exceptional thermal insulation. Aesthetically, it comes in a range of colours and patterns to accommodate for any property style.
Wood
Wood is a fashionable choice of cladding material. Many people appreciate the aesthetic quality of wood, which tends to increase property value. Wood is also a versatile and affordable material to build with. The disadvantage to wood is that it’s less fire-resistant and durable compared to other materials. Additionally, wood requires more maintenance and doesn’t last as long.
Steel
Steel is a common metallic granny flat cladding material. It is low maintenance, weatherproof and long-lasting. Steel is resistant to fire and moisture, preventing excessive heat or humidity in the home. The malleability of steel makes it versatile to build with but also vulnerable to getting dented. Additionally, steel cladding can also be noisy in heavy rainfall. While steel is very sturdy, it also comes with a high weight and cost.
How long do granny flats take to build?
Granny flats take an average of twelve to sixteen weeks to build. However, this amount of time is longer when including designs and building approvals. Up until now, it could take between seven and nine months to get planning approval from your local council. However, from April of 2024, planning approvals are no longer necessary. You must simply obtain building approval, which should take no longer than 10 business days. So the main factors for granny flat build time are building approvals, the design, and delays.
Approvals
Getting building approvals depends on the design’s compliance with the relevant codes and guidelines. Designs must first abide by the primary requirements for a granny flat. These include being a secondary dwelling on a lot, meeting size and setback limits, and effluent system application. They were also subject to minimum lot size requirements based on the Residential Design Codes. However, part of the new amendments for granny flats were eliminating this requirement from April of 2024. This was done largely to help combat the current housing crisis in Australia.
The building approval process can be complicated and time-consuming for anyone who has not gone through it before. We are very happy to work with clients to help make getting these approvals quickly and easily.
Designs
A granny flat’s design determines its structure and the materials used to build it. For a larger granny flat design, more materials and time are needed for installation. Various materials differ in their installation processes. For example, using wood may be slightly faster than using steel. Additionally, certain design features also extend build time: features like raked ceilings or a mezzanine floor are complex and take longer to install correctly. Finally, certain appliances can increase the building time if installation is complicated or supply is limited.
Delays
Delays happen due to unforeseen circumstances or suboptimal scheduling. Building during rainy periods of the year often creates delays as rain prevents certain construction processes.
Times of year with more public holidays – such as the Christmas period – noticeably push back building schedules. In a fire-restricted zone, the build will be halted during periods of increased fire danger.
Roadworks in your area can potentially block access to your build site, making it harder to install utilities. Any significant changes mid-build need to be resubmitted for building approval, further delaying the process.
How much does it cost to build a granny flat in Australia?
The cost of building a granny flat in Australia primarily depends on design and building costs. Intricate designs may include desirable features, but simple designs are often more affordable. Balancing your budget with the necessary features is the best strategy for long-term success.
Up until now, an often-overlooked cost factor has been resubmission cost. When you submit your granny flat design for planning approval, you must pay a certain amount. If your submission is rejected and must be resubmitted, you have to pay the cost again. However, this isn’t something to worry about since the new amendments will eliminate planning approvals for granny flats. Building approval is still necessary, though. By partnering with an industry professional, you can make sure that your building approval goes through without a hitch.
Overall, the main factors that impact granny flat building costs are the building provider, design and material choices.
The keys to a successful granny flat build
Find a reputable builder
Choosing the right builder is the most important decision in the construction process. After all, an industry-leading builder will support and guide you through the entire process.
Before choosing a builder, check reviews and testimonials, learn about their previous work, read case studies, and, most importantly, chat with the team about your vision and ideas before committing to the build. You can fill out the form on our website for a no-obligation chat with one of our specialists. We’ll ask you questions to get an idea of what you’re looking for, and together we can see whether we’re the right fit for each other.
Communicate with your builder
Throughout the build, stay in constant communication with your granny flat builder. Early on, ensure you’re on the same page about design choices. During the build, be aware of which stage of construction you are at and how the build is progressing. Transparency helps both sides work together conducively and results in the best build possible!
Define costs early on
It’s essential to lock down a fixed contract price with your granny flat builder before building commences. This ensures that costs are clearly defined, so you can budget appropriately. If you get into the build with only estimates, you may end up paying significantly more. This makes financing the build harder.
Complete all documentation
Complete all the necessary documentation for the build as early as possible. The build can not commence before everything is signed off. Doing it ahead of time helps builders to begin scheduling and building sooner.
Use a specialist builder
Hiring a specialist builder improves the construction process. It’s possible that they’ll be more expensive than a general builder, but you’re guaranteed to have better quality assurance and a smoother build. Additionally, more specific experience means they will provide better advice for your design and possess extensive knowledge on which materials are best to use.
Visit a granny flat display home.
Checking out some granny flat display homes provides you with design ideas and a sample of the builder’s craftsmanship. Design blueprints or pictures of granny flats don’t give the clearest idea of how a space feels. Walking through a granny flat display home provides a better reference point for room sizes. If a builder doesn’t have any display homes, ask to see examples of their previous work. If they are not willing to provide it, you should seek another builder.
You can take a 3D tour of our display homes through our home page, but for the real experience, come visit us at our Booragoon showroom for a personalised walk-through!
At Granny Flats WA, we provide high-quality building and communicate with you every step of the way. Contact us today to discuss building a granny flat.